(+ info on Uppsala) |
m (Moving TV adaptation to first position in gallery) |
||
| (31 intermediate revisions by 8 users not shown) | |||
| Line 1: | Line 1: | ||
{{Human infobox |
{{Human infobox |
||
| − | |image= |
+ | |image=<gallery> |
| + | Coram van Texel.png|TV adaptation |
||
| + | Fardercoram2.jpg|Film adaptation |
||
| + | </gallery> |
||
|name=Coram van Texel |
|name=Coram van Texel |
||
| − | |age= |
+ | |age=Around 50 |
| − | |birthdate= |
||
| − | |deathdate= |
||
|birth= |
|birth= |
||
|death= |
|death= |
||
| Line 15: | Line 16: | ||
|hair= |
|hair= |
||
|eyes= |
|eyes= |
||
| − | |skin= |
+ | |skin=Brown |
| − | |family=*[[Serafina Pekkala and |
+ | |family=*A [[Serafina Pekkala and Coram van Texel's son|son]] † |
| + | *[[Rosella]] (great-niece) |
||
|daemon=[[Sophonax]] |
|daemon=[[Sophonax]] |
||
|settledform=a {{Wplink|cat}} |
|settledform=a {{Wplink|cat}} |
||
| Line 22: | Line 24: | ||
|loyalty=*[[Gyptian]]s |
|loyalty=*[[Gyptian]]s |
||
*[[Oakley Street]] |
*[[Oakley Street]] |
||
| + | }} |
||
| − | + | '''Farder Coram van Texel'''<ref name="LBS4">{{Ref|book|6|4}}</ref> was an important member of the [[gyptian]]s. He took the role of second-in-command or adviser for the Gyptian King [[John Faa]]. His [[dæmon]], [[Sophonax]], was a larger than average, 'autumn-coloured' cat. |
|
==Biography== |
==Biography== |
||
| Line 29: | Line 32: | ||
===Visiting the University of Uppsala=== |
===Visiting the University of Uppsala=== |
||
| + | [[File:Uppsala.png|right|200px|thumb|Coram in Uppsala hiding from Gerard]] |
||
| − | Coram visited the [[University of Uppsala]] once to pass on a message from [[Martin Lanselius]] and the consul of the [[witch]]es to [[Gunnar Hallgrimsson]] and [[Axel Löfgren]]. There, they talked to him about the [[alethiometer]]. |
+ | Coram visited the [[University of Uppsala]] once to pass on a message from [[Martin Lanselius]] and the consul of the [[witch]]es to [[Gunnar Hallgrimsson]] and [[Axel Löfgren]]. There, they talked to him about the [[alethiometer]]. |
| + | When going back to his boarding house, Coram encountered [[Gerard Bonneville]] and his hyena-dæmon. He new that they had been following him from [[Novgorod]] and so he hid in an alley, letting them come in to follow him. Despite getting shot across the scalp by a [[gas pistol]], Coram and Sophonax sprung at the two. Coram used his stick of lignum vitae to fight them bothoff, cracking it as hard as he could against one of the dæmon's legs to stop her from biting on Sophonax and killing them both.<ref name="LBS4" /> |
||
| ⚫ | |||
| + | |||
| − | Coram accompanied [[Lyra Silvertongue]], [[John Faa]], [[Iorek Byrnison]], [[Lee Scoresby]] and 170 gyptians to [[Bolvangar]], where they rescued the children who had been kidnapped by the [[General Oblation Board]]. During the journey, Farder Coram taught Lyra to read the alethiometer. |
||
| + | ===''La Belle Sauvage''=== |
||
| + | Coram was tasked with bringing [[Malcolm Polstead]]'s [[La Belle Sauvage (canoe)|canoe]], ''La Belle sauvage'', back to [[The Trout Inn]] by [[Lord Asriel]]. He showed Malcolm the newly decorated boat and showed him how to use the [[coal-silk]] tarpaulin. Coram also warned Malcolm about both the huge flood that would happen shortly after their meeting and also to stay away from Bonneville.<ref name="LBS12">{{Ref|book|6|12}}</ref> |
||
| + | |||
| + | ===Meeting Lyra Belacqua=== |
||
| + | After the child [[Lyra Silvertongue|Lyra Belacqua]] arrived in the [[Fens]] and attended the gyptians' [[Byanroping]], she spoke to [[John Faa]] and Coram in a side room. Over some, they served some [[jenniver]] and talked about the [[General Oblation Board]] and also about how Lyra had ended up at [[Jordan College]] as a child.<ref name="NL7">{{Ref|book|1|7}}</ref> |
||
| + | |||
| + | The following day, after the second Byanroping, Lyra stormed into a meeting between the gyptian heads of families and demanded that she be taken to the [[North]] with them, but she was refused. Over the next few days, she would go around with Coram who took pity on her. Coram listened to Lyra's stories of [[Oxford (Lyra's world)|Oxford]] and of her time with [[Marisa Coulter]] and watched as she read her alethiometer. |
||
| + | |||
| + | Coram would help her understand the alethiometer, and assist her in finding out what they symbols meant. Later, Lyra read the alethiometer and found out that the gyptian spy, [[Benjamin de Ruyter]]. A few seconds later, a woman came in and said that [[Jacob Huismans]], another spy, was severely wounded. Coram hobbled over to him and they talked about what had happened before Jacob finally died. Coram alerted John where they decided that Lyra should go aboard the ship with them, under the care of Coram.<ref name="NL8">{{Ref|book|1|8}}</ref> |
||
| + | |||
| + | ===Voyage to the North=== |
||
| + | ====Trollesund==== |
||
| + | [[File:Spy-fly in a jar.jpg|right|150px|thumb|A spy-fly]] |
||
| + | Lyra travelled to the North with Coram and they would talk about the alethiometer together. One time, Lyra went up on the deck of the ship where two [[spy-fly|spy-flies]] saw her. Managing to capture one, Lyra and Coram took it downstairs where they carefully put it in a box. Coram was wary of it and very scared because now Marisa, who was looking for Lyra, would know where she was.<ref name="NL9">{{Ref|book|1|9}}</ref> |
||
| + | |||
| + | Over the next few weeks, they sailed up north to a port town called [[Trollesund]] in [[Lapland]]. When they arrived, Coram and Lyra went to visit the [[Witch]]-Consul, [[Martin Lanselius]], to ask for advice as to what to do. Martin advised them to seek the help of a [[panserbjørn]], an armoured bear, and then told Lyra to go outside as a test to see if she was the girl from the witches' prophecy. Whilst Lyra was using her alethiometer to see which [[cloud-pine]] the witch [[Serafina Pekkala]] once flew on, Coram and Martin exchanged a few words about the child. |
||
| + | |||
| + | Later that evening, the two made their way to [[Einarsson's Bar]] where the bear [[Iorek Byrnison]] was working. They talked to him about employing him to fight for the gyptians and rescue the children who were being taken. Iorek said he would if they found his [[Panserbjørn armour|armour]].<ref name="NL10">{{Ref|book|1|10}}</ref> |
||
| + | |||
| + | That night, the witch Serafina's dæmon, Kaisa, visited them on the ship. Coram was awoken by Lyra who went into his bedroom to alert him of the news. Kaisa exchanged news with Lyra, Coram and John and told them all about [[Bolvangar]], where the children were being taken.<ref name="NL11">{{Ref|book|1|11}}</ref> |
||
| + | |||
| ⚫ | |||
| + | [[File:Gyptians travelling north.png|right|250px|thumb|The gyptians travelling further north]] |
||
| + | The following day, Coram and John talked to the [[Sysselman]] about getting Iorek's armour back. During these talks, Lyra read the alethiometer and told Iorek where his armour was being kept. When they went down to the port of the town, they found Iorek washing his armour and ready to leave for Bolvangar.<ref name="NL11" /> |
||
| + | |||
| + | On their way, Lyra and Iorek went to [[Arctic village|a nearby village]] where the boy [[Tony Makarios]] was. When they brought him back, Coram looked after Lyra, warming her up in his tent. In the morning, Coram was the one to deliver then news that the little boy had died in the night.<ref name="NL13">{{Ref|book|1|13}}</ref> |
||
| + | [[File:The gyptians and children.png|left|210px|thumb|The gyptians and the children]] |
||
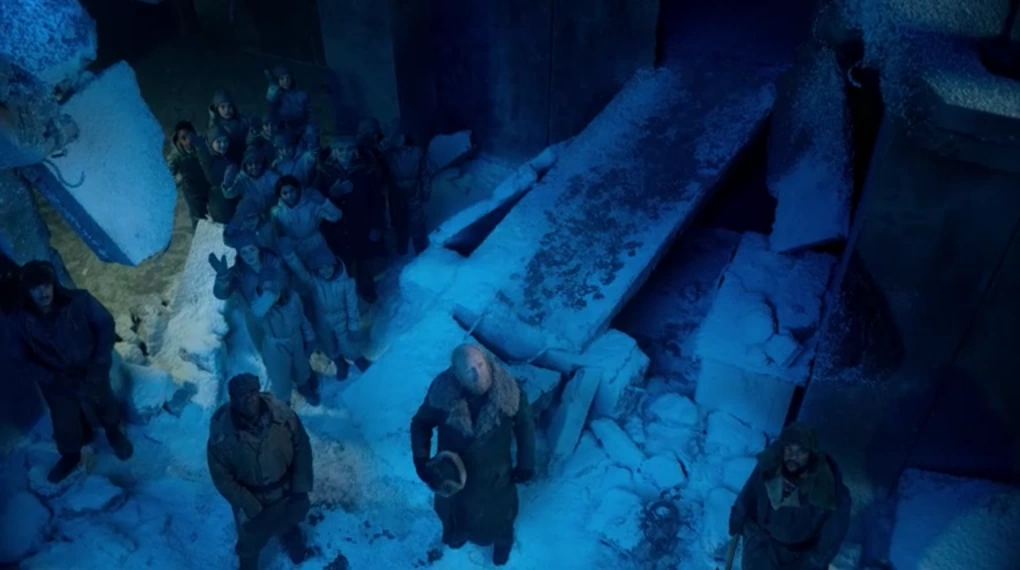
| + | After Lyra was taken by some [[Samoyed]] hunters, the gyptians continued towards Bolvangar. After Lyra led all the other children out of the building, the gyptians were there to rescue them and, upon seeing Lyra, Coram laughed out loud.<ref name="NL17">{{Ref|book|1|17}}</ref> |
||
| + | |||
| + | The gyptians, without Lyra (who had flown to [[Svalbard]]), then began their journey with the children back to [[Brytain]]. |
||
| + | |||
| + | ===Mulefa world=== |
||
| + | Serafina later flew to the gyptians to request their help in the war against the [[Authority]]. The gyptians travelled, with Serafina, to the [[mulefa world]] where Lyra was. After anchoring and a small speech, they went up to the village. Seeing Coram struggle, one [[Mulefa|zalif]] offered to take him there. Coram got on the zalif's back and rode to the village. |
||
| + | |||
| + | When they saw Lyra, both John and Coram gathered her up and kissed her on the cheeks. After a meal with the mulefa, Coram, John, Serafina and a woman called [[Mary Malone]] travelled with them to see a [[window]] into the [[world of the dead]] through which [[ghost]]s were coming out. The mulefa promised to protect it and regarded the place as holy. |
||
| + | |||
| + | The gyptians then decided to leave with Lyra and her new lover [[Will Parry]] to Oxford. Upon departing, Will said his goodbyes to the gyptians and later went into [[Oxford (Will's world)|his Oxford]].<ref name="TAS38">{{Ref|book|3|38}}</ref> |
||
| + | |||
| + | ===Fens=== |
||
| + | [[File:TSC15.png|right|250px|thumb|Possibly Coram's boat]] |
||
| + | After Lyra fled from Oxford for the third time in her life, at age 20, she saw Coram again.<ref name="TSC">{{Ref|book|7|15}}</ref> At this time, Coram didn't move from his boat a lot however he was still bright and cheerful.<ref name="TSC11">{{Ref|book|7|11}}</ref> Coram's boat was moored in the [[Ringland branch]] and was brightly painted with a well-tended path leading up to it. Coram was sleeping when Lyra arrived before waking up. Lyra had brought Coram some [[Old Ludgate]] and some ginger biscuits before telling him what had happened with her and her dæmon. Coram, in return, told Lyra about Oakley Street and the [[secret commonwealth]] before his great-niece [[Rosella]]. |
||
==Dæmon== |
==Dæmon== |
||
| Line 40: | Line 85: | ||
===Personality and appearance=== |
===Personality and appearance=== |
||
| − | Sophonax exhibited a courage akin to that of her human, for example being ready to fight when Coram first met |
+ | Sophonax exhibited a courage akin to that of her human, for example being ready to fight when Coram first met Gerard Bonneville. She aided Coram in catching the [[spy-fly]] that was sent by [[Marisa Coulter]] to find Lyra prior to their journey to the [[North]]. |
[[File:LBS Ch4.png|right|150px]] |
[[File:LBS Ch4.png|right|150px]] |
||
At first meeting, Lyra was amazed by the colour of Sophonax's fur, which varied from golden brown to the colour of autumn leaves. She was very large and strong for a cat, despite Coram's frailty. |
At first meeting, Lyra was amazed by the colour of Sophonax's fur, which varied from golden brown to the colour of autumn leaves. She was very large and strong for a cat, despite Coram's frailty. |
||
==Behind the scenes== |
==Behind the scenes== |
||
| − | * |
+ | *In ''[[The Golden Compass (film)|The Golden Compass]]'', Coram is portrayed by classical and Shakespearean actor {{Wplink|Tom Courtenay}}, and Sophonax was shown as a {{Wplink|caracal}}. |
| − | * |
+ | *Coram's surname, van Texel, refers to the Dutch island of {{Wplink|Texel}} and is pronounced 'van Tessel'. |
| − | * |
+ | *In ''[[La Belle Sauvage]]'', Coram is described as being 'brown-skinned'. |
| − | * |
+ | *In the [[His Dark Materials (TV series)|TV series]], Coram is played by {{Wplink|James Cosmo}}.<ref>[https://www.bbc.co.uk/mediacentre/latestnews/2018/his-dark-materials/ BBC and Bad Wolf unveil cast and creative team of His Dark Materials]</ref> |
| − | |||
==Appearances== |
==Appearances== |
||
| + | {{Imcat|Images of Coram van Texel}} |
||
| ⚫ | |||
| + | {{Imcat|Images of Sophonax|Sophonax}} |
||
| ⚫ | |||
| + | *''[[Northern Lights - The Graphic Novel]]'' |
||
*''[[The Golden Compass (film)]]'' |
*''[[The Golden Compass (film)]]'' |
||
*''[[The Golden Compass (video game)]]'' |
*''[[The Golden Compass (video game)]]'' |
||
| + | *''[[His Dark Materials (TV series)]]'', Series 1 |
||
| + | *''[[The Amber Spyglass]]'' |
||
*''[[La Belle Sauvage]]'' |
*''[[La Belle Sauvage]]'' |
||
| + | *''[[The Secret Commonwealth]]'' |
||
==References== |
==References== |
||
{{Reflist}} |
{{Reflist}} |
||
| − | {{Stub|article}} |
||
[[it:Farder Coram]] |
[[it:Farder Coram]] |
||
[[pt-br:Farder Coram]] |
[[pt-br:Farder Coram]] |
||
[[fr:Coram van Texel]] |
[[fr:Coram van Texel]] |
||
[[ru:Фардер Корам]] |
[[ru:Фардер Корам]] |
||
| − | [[Category:Gyptian individuals |
+ | [[Category:Gyptian individuals]] |
| − | [[Category:Humans |
+ | [[Category:Humans]] |
| − | [[Category:Males |
+ | [[Category:Males]] |
| − | [[Category:Oakley Street members |
+ | [[Category:Oakley Street members]] |
Revision as of 19:08, 6 December 2019
Farder Coram van Texel[1] was an important member of the gyptians. He took the role of second-in-command or adviser for the Gyptian King John Faa. His dæmon, Sophonax, was a larger than average, 'autumn-coloured' cat.
Biography
Relationship with Serafina Pekkala
In the 1950s, Coram saved Serafina Pekkala from drowning in a lake. The witch was being attacked by a large red bird, which Coram shot before he realised it was another witch's dæmon. Serafina told him he could call on her any time he needed her.[2] This bond was reinforced later in Coram's life when he was shot by a Skraeling and Pekkala healed him.[2] The two later had a son, however the young boy fell victim to an epidemic and died.[3]
Visiting the University of Uppsala
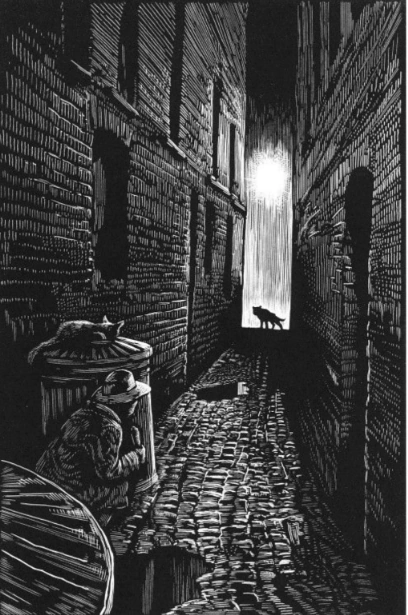
Coram in Uppsala hiding from Gerard
Coram visited the University of Uppsala once to pass on a message from Martin Lanselius and the consul of the witches to Gunnar Hallgrimsson and Axel Löfgren. There, they talked to him about the alethiometer.
When going back to his boarding house, Coram encountered Gerard Bonneville and his hyena-dæmon. He new that they had been following him from Novgorod and so he hid in an alley, letting them come in to follow him. Despite getting shot across the scalp by a gas pistol, Coram and Sophonax sprung at the two. Coram used his stick of lignum vitae to fight them bothoff, cracking it as hard as he could against one of the dæmon's legs to stop her from biting on Sophonax and killing them both.[1]
La Belle Sauvage
Coram was tasked with bringing Malcolm Polstead's canoe, La Belle sauvage, back to The Trout Inn by Lord Asriel. He showed Malcolm the newly decorated boat and showed him how to use the coal-silk tarpaulin. Coram also warned Malcolm about both the huge flood that would happen shortly after their meeting and also to stay away from Bonneville.[4]
Meeting Lyra Belacqua
After the child Lyra Belacqua arrived in the Fens and attended the gyptians' Byanroping, she spoke to John Faa and Coram in a side room. Over some, they served some jenniver and talked about the General Oblation Board and also about how Lyra had ended up at Jordan College as a child.[5]
The following day, after the second Byanroping, Lyra stormed into a meeting between the gyptian heads of families and demanded that she be taken to the North with them, but she was refused. Over the next few days, she would go around with Coram who took pity on her. Coram listened to Lyra's stories of Oxford and of her time with Marisa Coulter and watched as she read her alethiometer.
Coram would help her understand the alethiometer, and assist her in finding out what they symbols meant. Later, Lyra read the alethiometer and found out that the gyptian spy, Benjamin de Ruyter. A few seconds later, a woman came in and said that Jacob Huismans, another spy, was severely wounded. Coram hobbled over to him and they talked about what had happened before Jacob finally died. Coram alerted John where they decided that Lyra should go aboard the ship with them, under the care of Coram.[2]
Voyage to the North
Trollesund
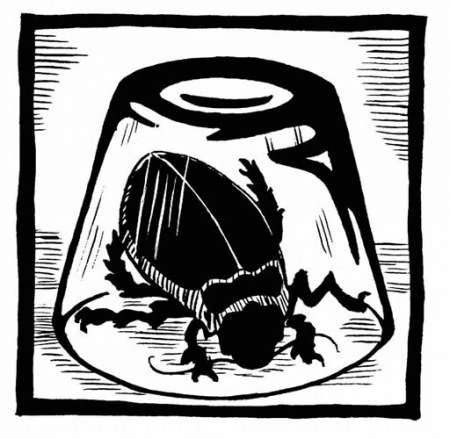
A spy-fly
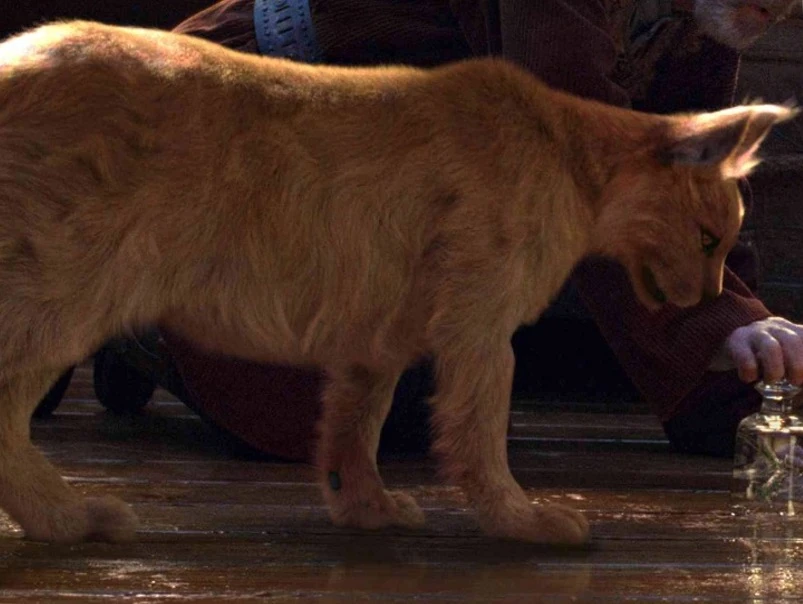
Lyra travelled to the North with Coram and they would talk about the alethiometer together. One time, Lyra went up on the deck of the ship where two spy-flies saw her. Managing to capture one, Lyra and Coram took it downstairs where they carefully put it in a box. Coram was wary of it and very scared because now Marisa, who was looking for Lyra, would know where she was.[6]
Over the next few weeks, they sailed up north to a port town called Trollesund in Lapland. When they arrived, Coram and Lyra went to visit the Witch-Consul, Martin Lanselius, to ask for advice as to what to do. Martin advised them to seek the help of a panserbjørn, an armoured bear, and then told Lyra to go outside as a test to see if she was the girl from the witches' prophecy. Whilst Lyra was using her alethiometer to see which cloud-pine the witch Serafina Pekkala once flew on, Coram and Martin exchanged a few words about the child.
Later that evening, the two made their way to Einarsson's Bar where the bear Iorek Byrnison was working. They talked to him about employing him to fight for the gyptians and rescue the children who were being taken. Iorek said he would if they found his armour.[7]
That night, the witch Serafina's dæmon, Kaisa, visited them on the ship. Coram was awoken by Lyra who went into his bedroom to alert him of the news. Kaisa exchanged news with Lyra, Coram and John and told them all about Bolvangar, where the children were being taken.[3]
Bolvangar

The gyptians travelling further north
The following day, Coram and John talked to the Sysselman about getting Iorek's armour back. During these talks, Lyra read the alethiometer and told Iorek where his armour was being kept. When they went down to the port of the town, they found Iorek washing his armour and ready to leave for Bolvangar.[3]
On their way, Lyra and Iorek went to a nearby village where the boy Tony Makarios was. When they brought him back, Coram looked after Lyra, warming her up in his tent. In the morning, Coram was the one to deliver then news that the little boy had died in the night.[8]

The gyptians and the children
After Lyra was taken by some Samoyed hunters, the gyptians continued towards Bolvangar. After Lyra led all the other children out of the building, the gyptians were there to rescue them and, upon seeing Lyra, Coram laughed out loud.[9]
The gyptians, without Lyra (who had flown to Svalbard), then began their journey with the children back to Brytain.
Mulefa world
Serafina later flew to the gyptians to request their help in the war against the Authority. The gyptians travelled, with Serafina, to the mulefa world where Lyra was. After anchoring and a small speech, they went up to the village. Seeing Coram struggle, one zalif offered to take him there. Coram got on the zalif's back and rode to the village.
When they saw Lyra, both John and Coram gathered her up and kissed her on the cheeks. After a meal with the mulefa, Coram, John, Serafina and a woman called Mary Malone travelled with them to see a window into the world of the dead through which ghosts were coming out. The mulefa promised to protect it and regarded the place as holy.
The gyptians then decided to leave with Lyra and her new lover Will Parry to Oxford. Upon departing, Will said his goodbyes to the gyptians and later went into his Oxford.[10]
Fens
Possibly Coram's boat
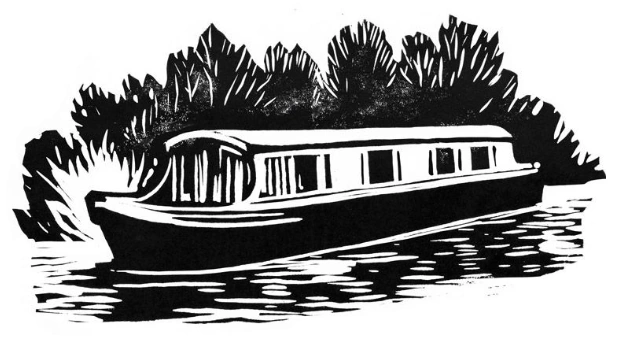
After Lyra fled from Oxford for the third time in her life, at age 20, she saw Coram again.[11] At this time, Coram didn't move from his boat a lot however he was still bright and cheerful.[12] Coram's boat was moored in the Ringland branch and was brightly painted with a well-tended path leading up to it. Coram was sleeping when Lyra arrived before waking up. Lyra had brought Coram some Old Ludgate and some ginger biscuits before telling him what had happened with her and her dæmon. Coram, in return, told Lyra about Oakley Street and the secret commonwealth before his great-niece Rosella.
Dæmon
- "Ten years after this evening, and again ten years after that, Lyra would marvel at the colouring of that dæmon's fur."
- —Description of Sophonax[src]
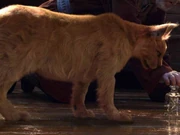
Coram's dæmon was a large autumn-coloured queen cat named Sophonax, affectionately referred by him as Sophie.
Personality and appearance
Sophonax exhibited a courage akin to that of her human, for example being ready to fight when Coram first met Gerard Bonneville. She aided Coram in catching the spy-fly that was sent by Marisa Coulter to find Lyra prior to their journey to the North.
At first meeting, Lyra was amazed by the colour of Sophonax's fur, which varied from golden brown to the colour of autumn leaves. She was very large and strong for a cat, despite Coram's frailty.
Behind the scenes
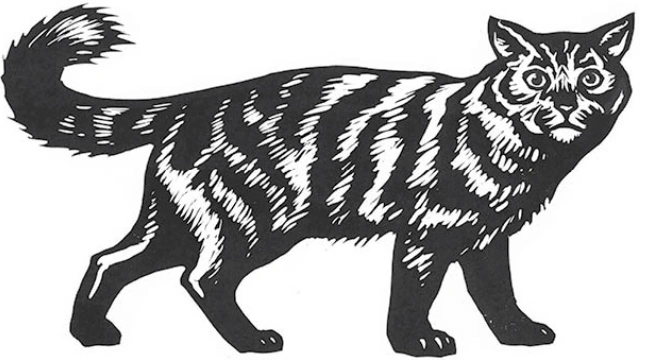
- In The Golden Compass, Coram is portrayed by classical and Shakespearean actor Tom Courtenay, and Sophonax was shown as a caracal.
- Coram's surname, van Texel, refers to the Dutch island of Texel and is pronounced 'van Tessel'.
- In La Belle Sauvage, Coram is described as being 'brown-skinned'.
- In the TV series, Coram is played by James Cosmo.[13]
Appearances
- Northern Lights
- Northern Lights - The Graphic Novel
- The Golden Compass (film)
- The Golden Compass (video game)
- His Dark Materials (TV series), Series 1
- The Amber Spyglass
- La Belle Sauvage
- The Secret Commonwealth
References
- ↑ 1.0 1.1 La Belle Sauvage, Chapter 4
- ↑ 2.0 2.1 2.2 Northern Lights, Chapter 8
- ↑ 3.0 3.1 3.2 Northern Lights, Chapter 11
- ↑ La Belle Sauvage, Chapter 12
- ↑ Northern Lights, Chapter 7
- ↑ Northern Lights, Chapter 9
- ↑ Northern Lights, Chapter 10
- ↑ Northern Lights, Chapter 13
- ↑ Northern Lights, Chapter 17
- ↑ The Amber Spyglass, Chapter 38
- ↑ The Secret Commonwealth, Chapter 15
- ↑ The Secret Commonwealth, Chapter 11
- ↑ BBC and Bad Wolf unveil cast and creative team of His Dark Materials